
Add Audio to Payhip Website
1. Create A ButterReader Account
Once you are able to access your dashboard you should see an embed code on the bottom right of the screen.
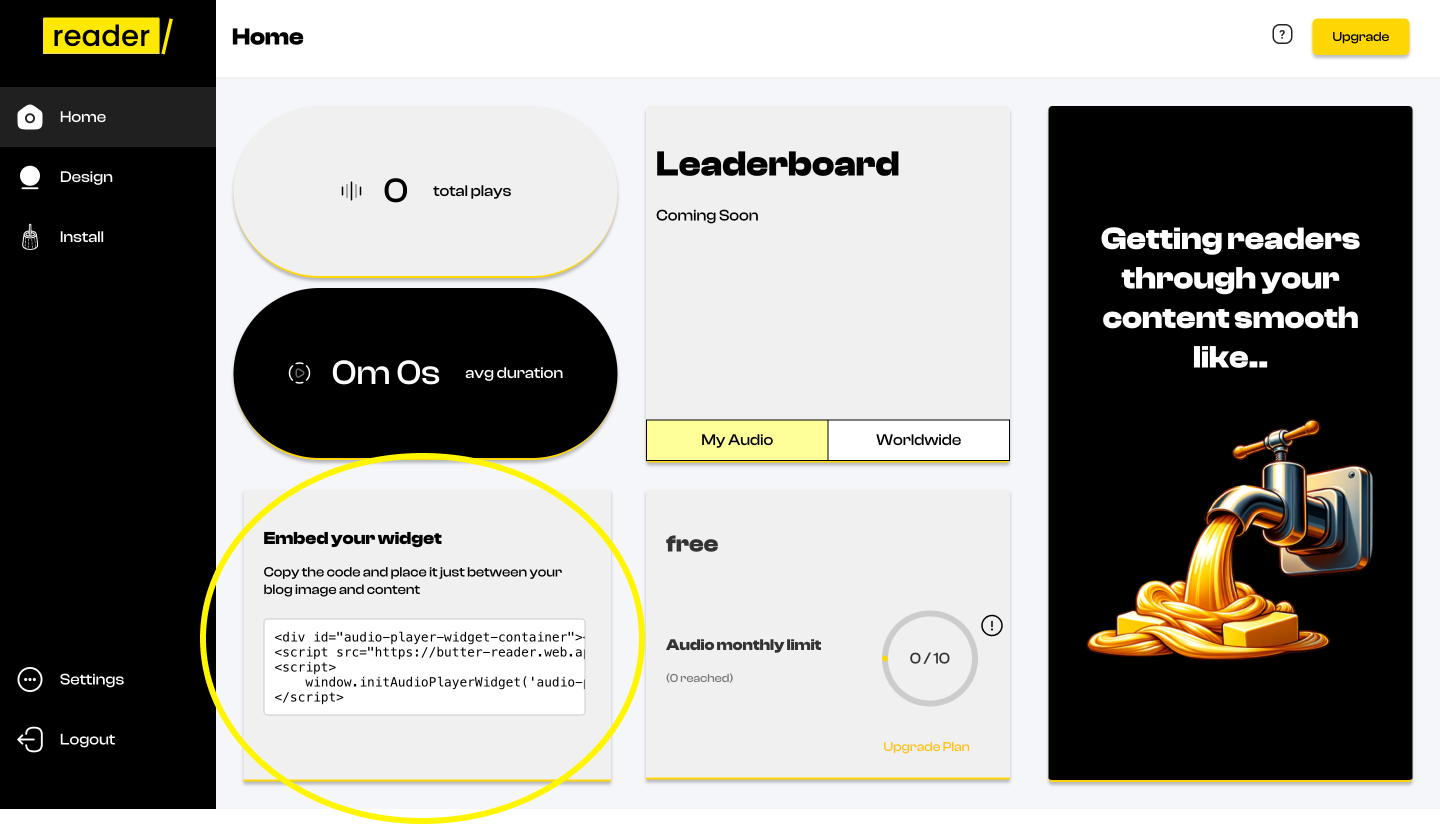
Click on the box in order to copy the embed code properly.
2. Login to PayHip
Navigate to the store tab and and select the "Launch Your Store Builder" button.
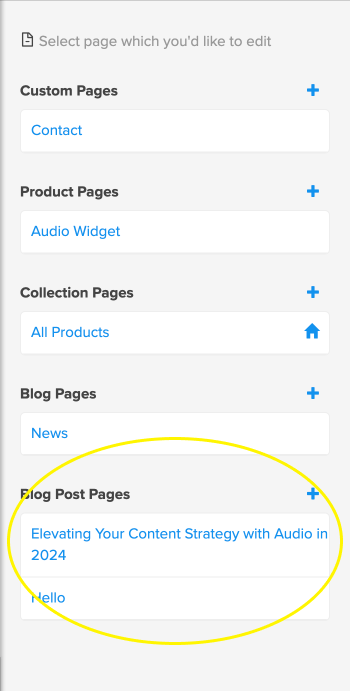
Create Some Sample Blog Post
- If you don't already have a few blog post then you must create some to add the widget successfully
- Once you have a few click any of them.
- On the right side navigate the edit all button to best expedite the process.

Make Sure You Have A Custom Domain
In order for you to add an embed widget you must have a custom domain on Payhip. You can do this by navigating to store tab, then seeking the domains tab.
3. Add Embed Element to Site
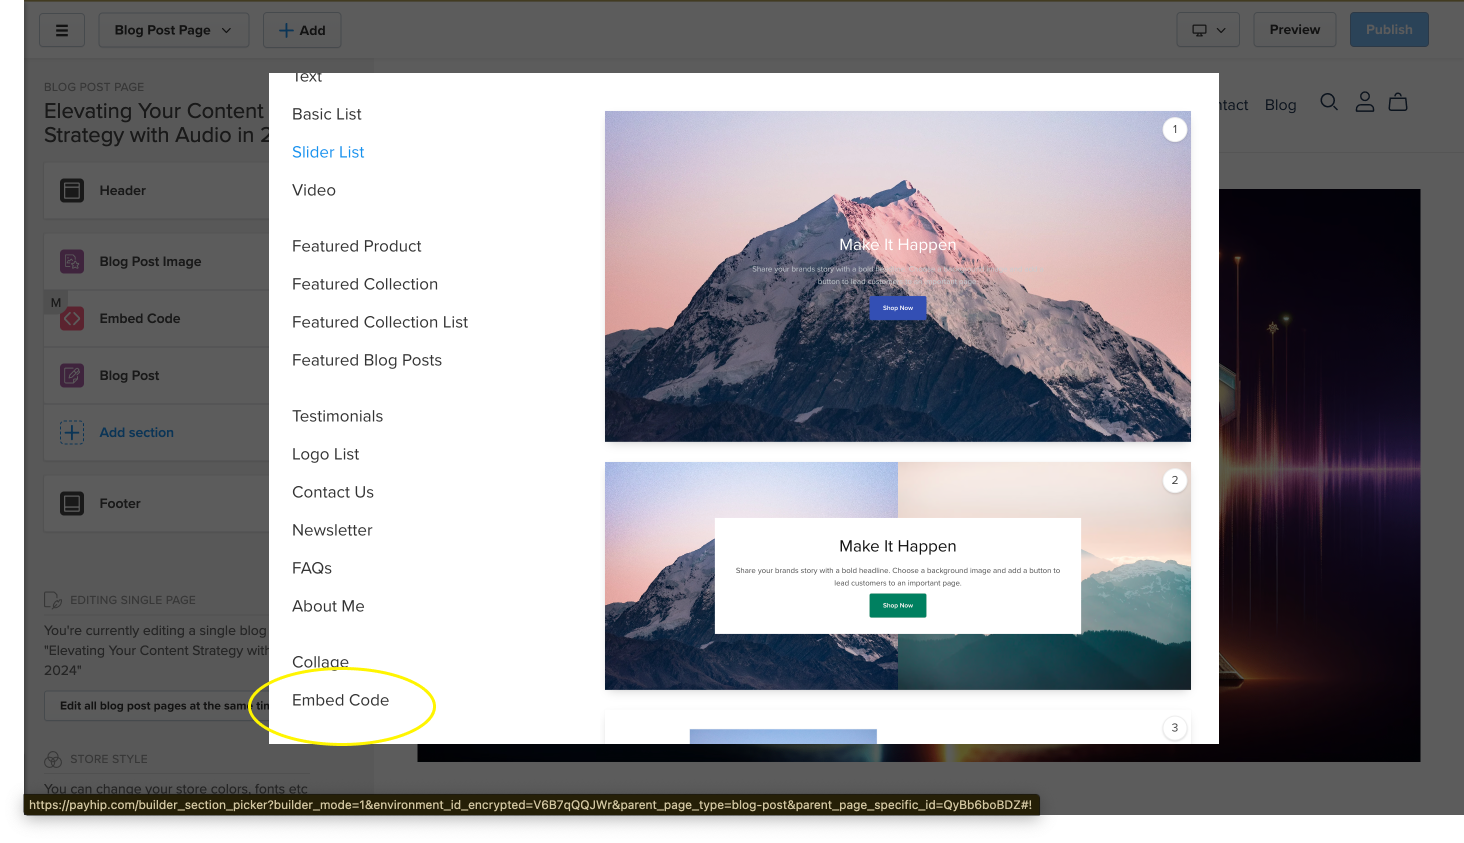
- Click on add on the top left of the design page.
- This pop up should appear after selecting add section
- Navigate to the bottom and click embed code.
- Paste the copied code from Step 1 in the embed code input box on the left hand side.
- Save changes and position embed code where you wish to see it on the live page
Hope you enjoy🧈
Quick and Easy Installation on All Hosting Platforms


Try it Out For Free
Check out our single player playground that allows you to begin without needing an account
Get a Demo